Creating the BNI Awards Plaques
Today’s post takes you step by step through the process for making the amazing BNI Awards featured in the photo above.
While no individual step was difficult, this was a multi-stage project which required planning so we did everything in the correct order. We also worked to tight timescales with no margin for error.
Design considerations
BNI is the world’s largest networking organisation. Each member belongs to a chapter, and each chapter meets weekly. Performance is tracked and the best performing members and chapters in each region win awards.
Since chapter awards are displayed at meetings each week, then packed away until the next week, we needed a sturdy, durable design. That was a factor in choosing engraved wood plaques which fit easily into slotted stands.
Branding is important, so the BNI brand red was a central feature of the colour scheme, with a contrasting black background. Gold was used as a third colour to add a little something special.
Creating the plaques
We created a total of eight plaques for various different awards – three large ones and five smaller ones.
Preparation
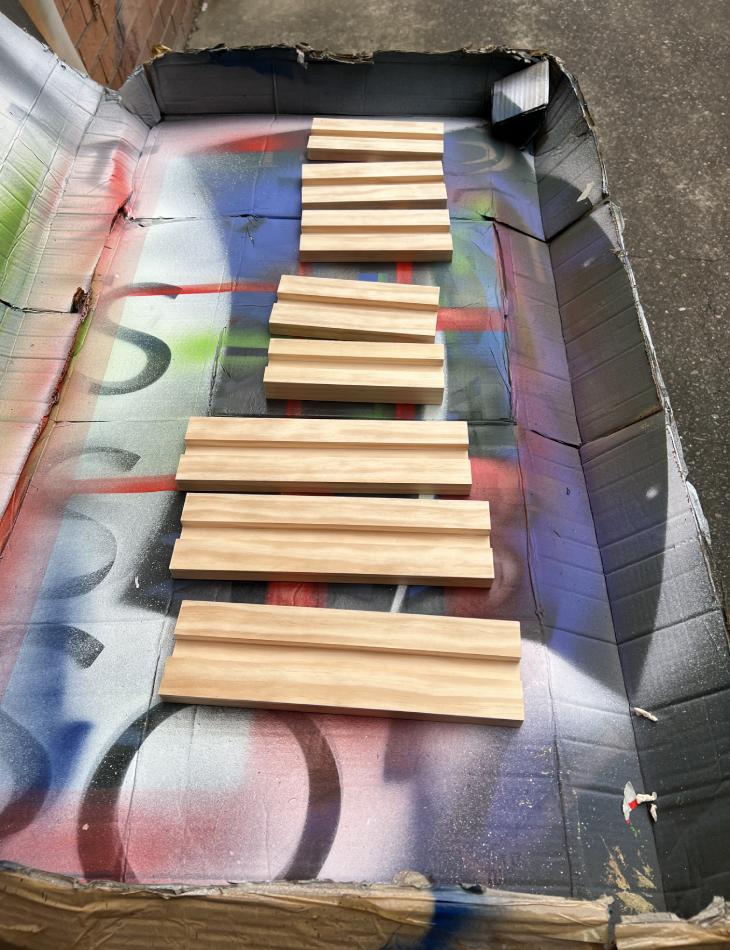
The first stage was to cut the plaques and stands from Tasmanian oak. We used a router to create slots in the stands, just the right size to insert the plaques.
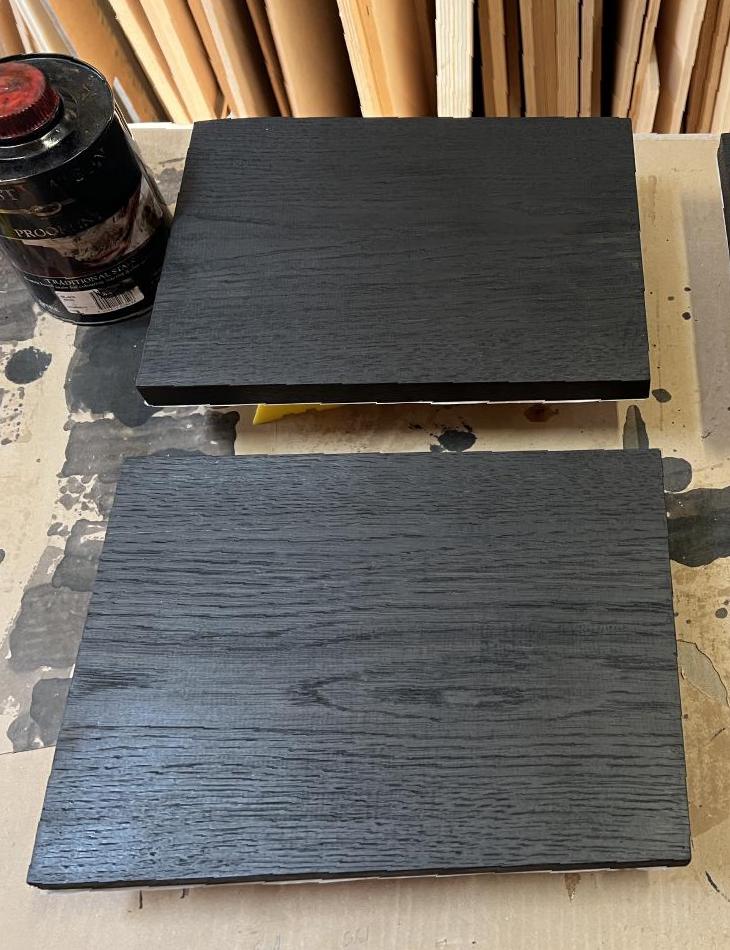
Once we had the shapes right, we stained them with the base black colour (Japan Black) and let them dry.
Engraving
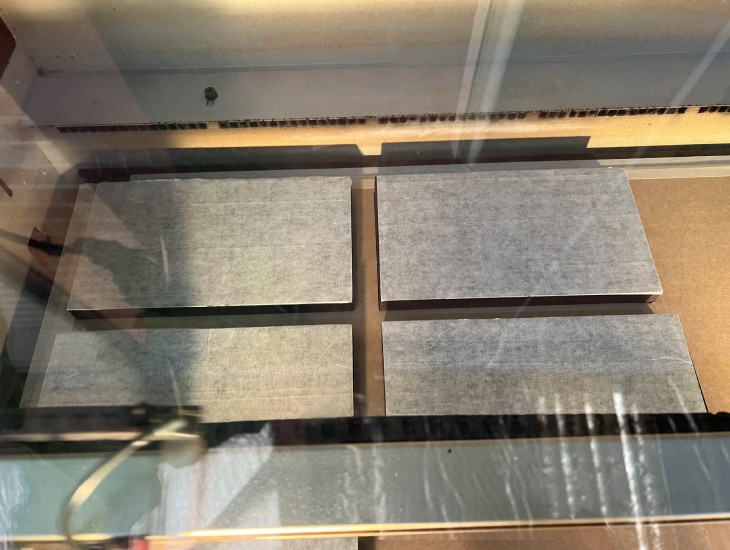
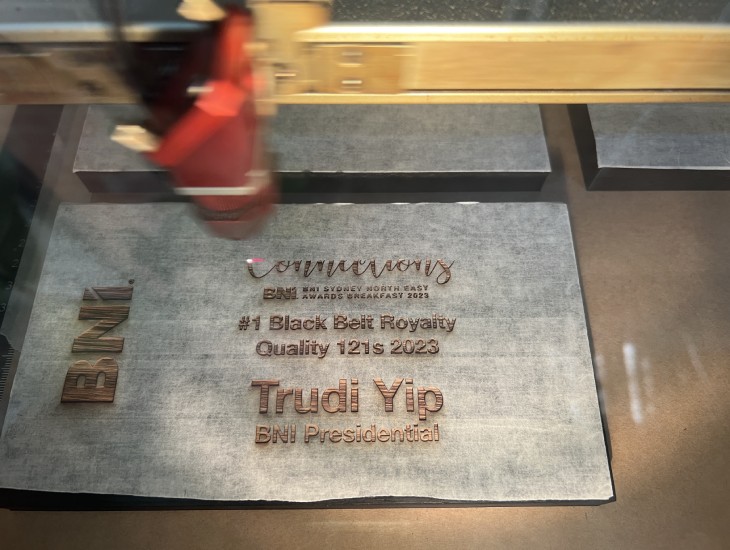
The next step was to engrave the correct design on each plaque. You can see four of the plaques here, inserted into one of our laser cutters. We put a layer of protective tape on so that smooth black surface wouldn’t be damaged. Once everything was set up, we put our trusty laser cutter Gonzalez (named for its speed) to work on the engraving.
Painting
The laser had cut through the protective tape, leaving only the design elements exposed. It was almost like a stencil.
If we’d only been adding one colour, the next step would have been a simple spray job. But we wanted some parts of the engraving to be red and other parts to be gold. So we added more protective tape to cover the gold areas, before we added the red.

Once the red was dry, we moved on to the gold. We removed the protective tape from the gold areas, then taped over the engraved and red-painted area.
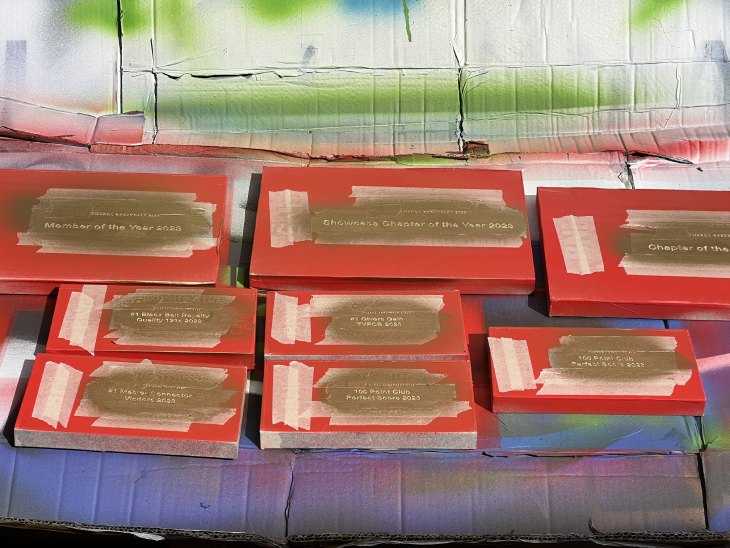
At this stage, it looks like the background is red, but in fact the very first layer of protective tape is still in place, protecting the black background. It’s just covered in red paint!
Finishing touches
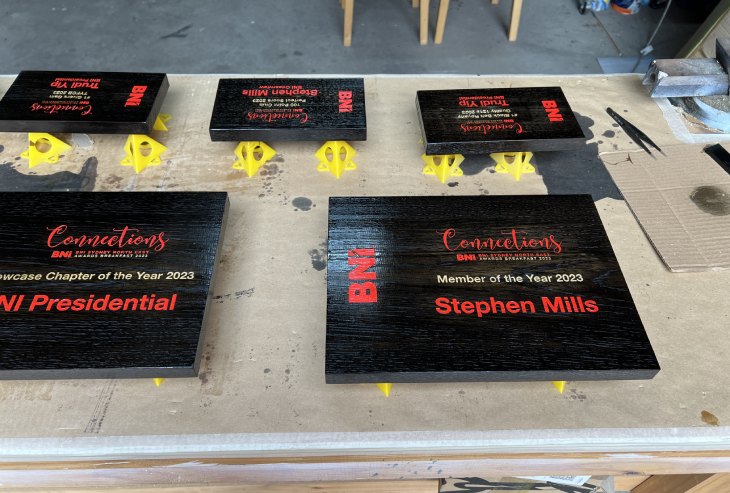
When we removed all the layers of protective tape, it revealed the overall effect. But we still needed to add varnish to give a final finish.

The photo above shows the plaques after one coat of varnish. You can see that they’re still quite matt in appearance. We dried them resting on points to keep the varnish surface as smooth as possible, even on the back.
We put three coats of varnish on altogether, and moved the points between each coat. You can see how the plaques have taken on more sheen as we add coats of varnish.
The final result
Here’s what the awards looked like assembled and ready to go.
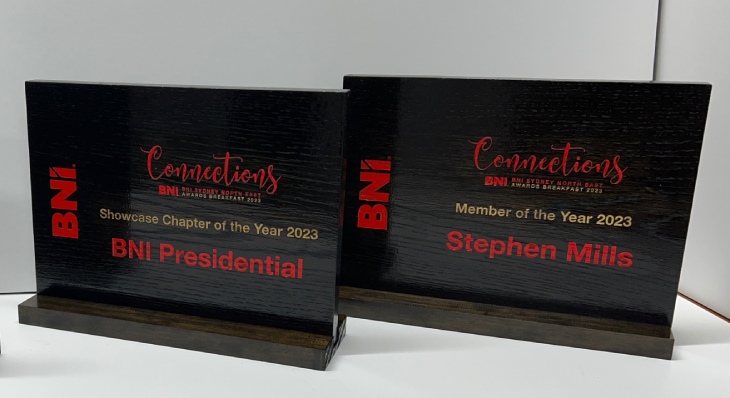
Now they display it every week at the BNI Presidential Chapter weekly meeting! We’re thrilled they’re so proud of it and want to show it off.
If you’re looking for custom award plaques which stand out and reflect your brand, let’s have a chat and explore some ideas.
